 Save to Pinterest
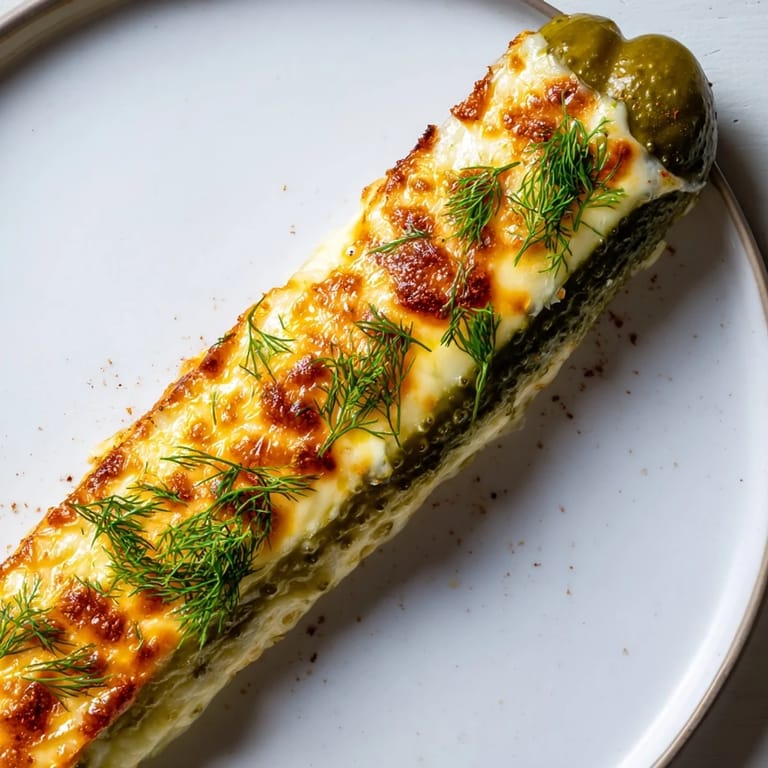
 My neighbor brought these to a potluck last spring, and I watched them disappear faster than anything else on the table. When she finally shared the recipe, I was shocked at how simple it was—just cheese, pickles, and a hot skillet. Now I make them whenever I need something that looks fancy but takes barely any effort, and honestly, they've become my secret weapon for keeping people happy in my kitchen.
I made these for my sister's game night, and she claimed they were better than anything at the fancy wine bars she visits. The funny part was that I'd made them in a mild panic, thinking I had nothing appetizer-worthy on hand, and suddenly I was getting requests to bring them to every gathering that followed.
Ingredients
- Mozzarella or Cheddar Cheese: Eight slices at about twenty grams each—the cheese is your vessel and your crispy exterior, so quality matters more than you'd think.
- Dill Pickle Spears: Eight spears that have been well-drained and patted dry—moisture is the enemy of crispiness, so don't skip the paper towels.
- Fresh Dill (Optional): One tablespoon finely chopped, adds brightness if you want to dress them up after cooking.
- Garlic Powder (Optional): One teaspoon for a savory depth that works beautifully with both cheese and pickle.
- Smoked Paprika (Optional): One teaspoon that brings a warm, slightly smoky note to the finish.
- Butter or Neutral Oil: One tablespoon for cooking, choose whatever you're comfortable with—I use butter for the flavor but oil works just fine.
Tired of Takeout? 🥡
Get 10 meals you can make faster than delivery arrives. Seriously.
One email. No spam. Unsubscribe anytime.
Instructions
- Get Your Pickles Ready:
- Pat each pickle spear with paper towels until they feel completely dry to the touch. Any lingering moisture will steam instead of crisp, so take a moment with this step.
- Heat Your Skillet:
- Place a large nonstick skillet over medium heat and let it warm through for about a minute. You want it hot enough that the cheese melts and bubbles immediately when it hits the pan.
- Melt the Cheese:
- Add a small piece of butter or oil, then lay one slice of cheese flat in the skillet. Watch it carefully—within one to two minutes, the edges will turn golden and begin to crisp while the center stays soft enough to roll.
- Roll with the Pickle:
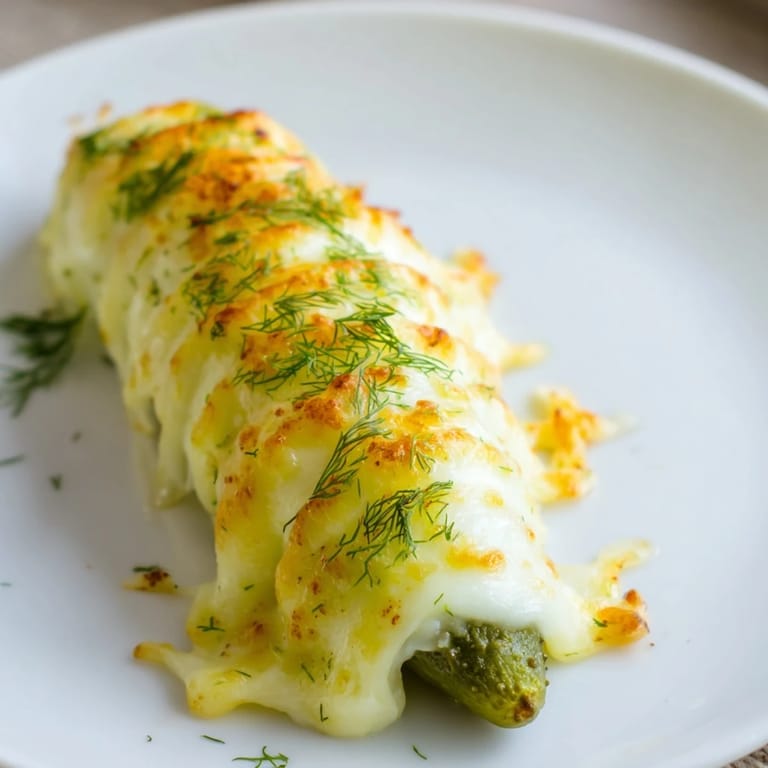
- Place a pickle spear on one edge of the melted cheese and use your spatula to gently roll the cheese around it, creating a tight cylinder. The warmth makes it pliable, and the crispy edges give you something to grip.
- Set and Repeat:
- Transfer each roll to a clean plate and continue with the remaining cheese and pickles. The first rolls will still be warm when you finish the last one.
- Season If You Like:
- While the rolls are still warm, sprinkle with fresh dill, garlic powder, or smoked paprika if you want that extra layer of flavor.
- Serve Right Away:
- These are best eaten immediately while the cheese is still crispy and the pickle is cool inside. That contrast is what makes them special.
 Save to Pinterest
 The first time I made these for my kids, my youngest asked why I'd never made them before, and suddenly it felt like I'd been holding out on them. Now they request them more often than I want to admit, and I've started keeping extra pickles on hand just for this purpose.
Cheese Choices That Change Everything
Mozzarella gives you a mild, classic flavor that lets the pickle shine, while cheddar adds richness and a bit of sharpness. I've ventured into pepper jack for extra heat and smoked gouda when I want something more sophisticated. Each cheese behaves slightly differently when it melts, so don't be afraid to experiment once you've nailed the basic technique.
Making Them Heartier
You can slip a thin slice of ham or turkey inside before rolling if you want something more substantial. I've also tried adding a tiny smear of mustard before rolling, which transforms the whole vibe into something deli-inspired. The beauty is that the basic formula stays the same—just layer in what sounds good to you.
Serving and Storage Secrets
These are honestly meant to be served hot and eaten immediately, but I've kept them warm in a low oven for up to ten minutes if needed. They don't really store well because the cheese hardens as it cools, but leftovers can be gently reheated in a skillet for about a minute per side. A spicy mustard or cool ranch dipping sauce on the side makes them feel like you've really put in effort.
- Make sure your skillet is truly nonstick so the cheese doesn't stick and tear when you roll it.
- If you're making these for a crowd, you can set up a little assembly line and keep them warm on a plate in a two hundred-degree oven.
- These are naturally gluten-free and vegetarian, but always check your pickle and cheese labels if you're cooking for someone with specific dietary needs.
 Save to Pinterest
 These rolls taught me that sometimes the best appetizers are the ones that look more complicated than they actually are. Keep them in your back pocket for whenever you need something fast, impressive, and genuinely delicious.
Questions & Answers About This Recipe
- → What type of cheese works best for these rolls?
Mozzarella and cheddar both melt well and provide a creamy texture. For extra flavor, try pepper jack or smoked gouda.
- → How can I ensure the rolls turn out crispy?
Make sure to pat the pickle spears dry before wrapping to prevent sogginess, and cook the rolls over medium heat until edges are golden and crisp.
- → Can I add extra flavors to the rolls?
Yes, sprinkling fresh dill, garlic powder, or smoked paprika on the rolls while warm enhances the flavor profile.
- → What cooking tools do I need?
A nonstick skillet, spatula, and paper towels are essential for creating these rolls with ease.
- → Are these rolls suitable for gluten-free diets?
Yes, using gluten-free ingredients like plain pickles and cheese makes this snack gluten-free friendly.